Git Tutorial [Part 1] - cloning, add branch, staging, pushing
1. Cloning a Repository
This step downloads a Git project into your local machine where you can modify the code and push it back to the repository on either the same branch or create a new one.

git clone <"git repo url">
In this article, we’ll focus on pushing changes to different branches, representing various versions of the code. These version updates will eventually be merged with the main branch repository.
2. Modifying Code
To make any changes in your local copy of the project, you need to edit, replace, or remove files (any modification is sufficient for a push). For this example, I’ll demonstrate how to modify shell program files by removing and replacing them with updated versions that I’ve already made on my local machine.

For Power Users:
As someone who’s comfortable using the terminal, you can use Unix-based commands like rm and cp to make these modifications efficiently. For instance, if you need to remove some shell program files and replace them with new ones, this is a straightforward process that I’ve already completed on my local machine.
For Normal Users:
If you’re not comfortable using the terminal, don’t worry! You can use your preferred GUI programs or IDEs like VScode or Intellij. Simply open File Explorer, navigate to the project root folder, and make any necessary changes in your chosen editor.
Except this part you can follow upcoming parts just as mentioned in article.
3. Switching Branches
After making these modifications, first verify which branch you’re currently on.
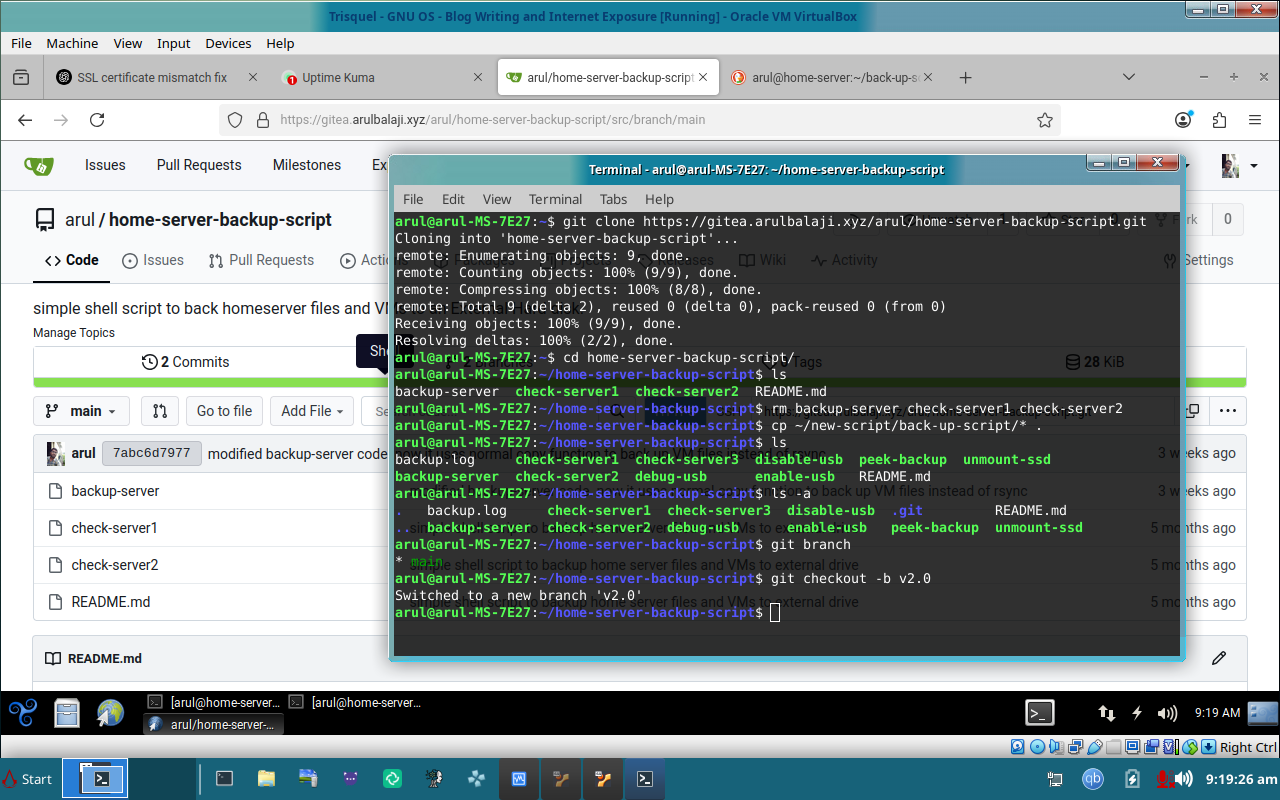
You can see I have copied quite a handful of new bash script files in the project local folder along with the modified files. After I type ls and ls -a, it lists all the files in my project local repo folder.
# now a user need to check their current branch where the project is cloned from using:

git branch

# then user can checkout to desired branch using.
# Note that this below command not only switches between existing branches but also allows creating a new branch with the specified name if the branch doesn't exist by default in the repo.

git checkout -b <"provide desired branch name">
4. Staging and Committing Changes
Now it’s time to add your modified files for staging and commit them:

Here I have added all the newly modified files including hidden files and subdirectories.
# git add . -> will add all the files including newly modified or included normal files, hidden files and subdirectories.

git add .

#commit the change with useful hit or message

git commit -m <"the message you want to display in repo..regarding your change on code">
5. Pushing Changes
To push your staged code to the repository, use:
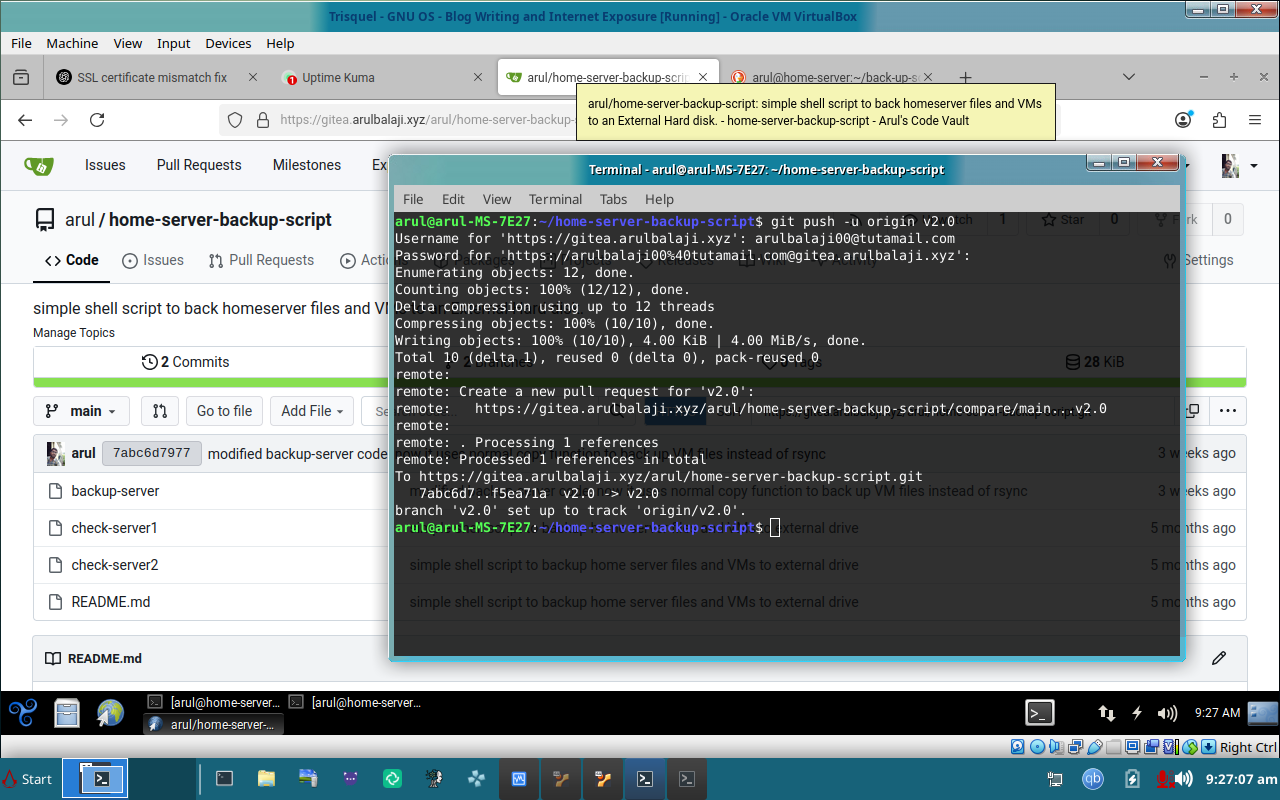
Here I use below command to push the staged files:
# Replace branch name with the name of the branch you're pushing changes to.

git push -u origin <"provided the branch name we checkout before in step 3 to push code">
6. Verifying Code on GitHub (or Your Self-Hosted Git Server)
After successfully pushing your changes, head over to your self-hosted Gitea server or GitHub account and verify that the code has been updated correctly:

Here in this article I use my self-hosted Gitea server, which is pretty much the same as GitHub. You should see a notification on top about recent activity, such as “you pushed v2.0 3 minutes ago”. Clicking on this will allow you to examine the details of the change.
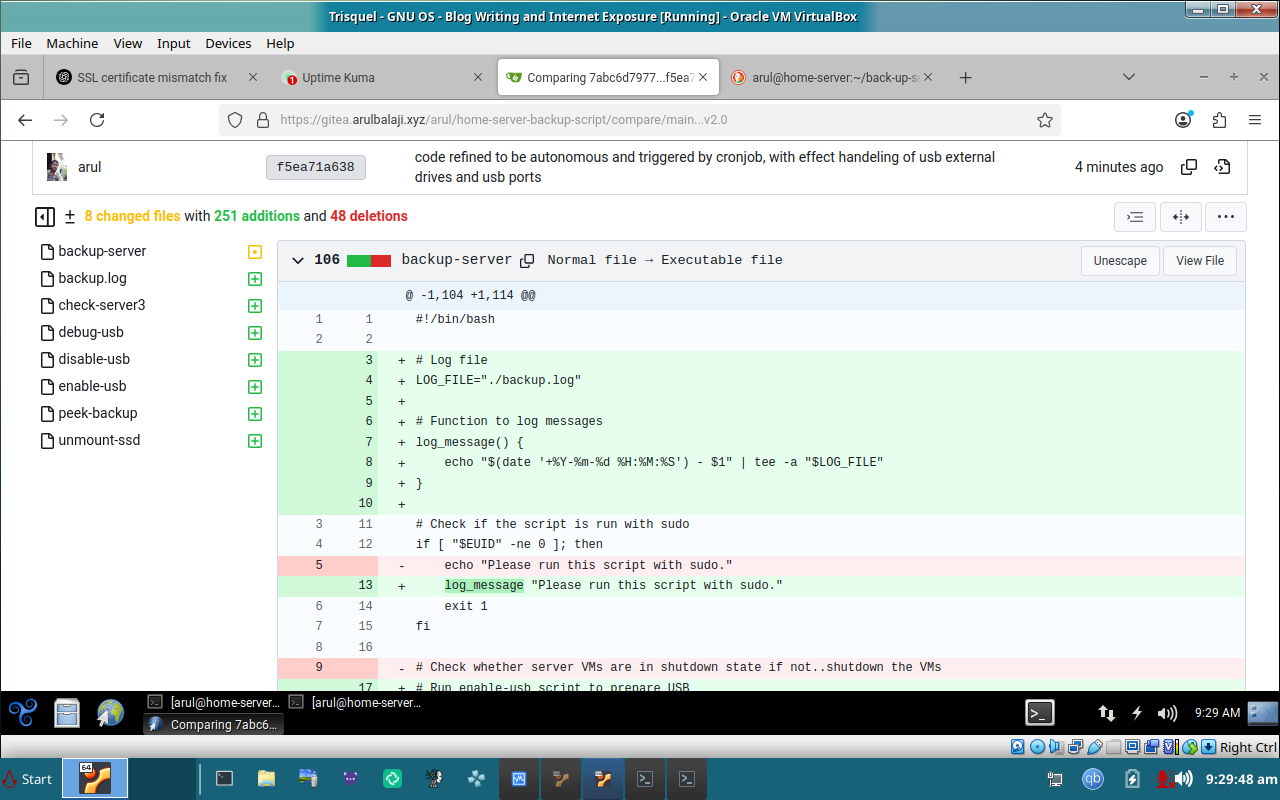
The below screenshot with v2.0 branch selected proves that the code push is successful.

In the above image, we can verify that the timestamp on each file that was pushed is 3 minutes ago. The two files: check-server1, check-server2 were not modified, hence the repo keeps the old code which was pushed 5 months ago.

Examining PR Section
By clicking the “New Pull Request” button on this notification “you pushed v2.0 3 minutes ago”, you can delve deeper into evaluating your recent code changes line by line.

Follow up with upcoming Git series!
Until that… Peace! ✌️